Using Textures on a model
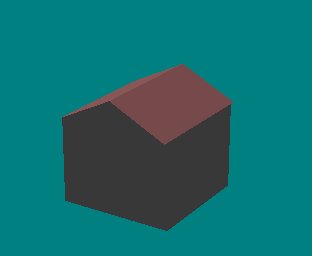
The simple shed we made in the Last Tutorial is OK as shape, but is only simple coloured panels, we can make it look better by applying texture bitmaps to the model.
Textures
In Rail3D speak a "Texture" is a bitmap applied to a model panel to give it more colour and detail than a simple coloured panel. Textures are bitmap files in .BMP or .TGA format and must be stored in the same folder as the model file, or the Rail3D "Textures" folder.
To start with we are going to apply a tile texture to the roof.
Have the model file from the last tutorial open in the editor:
NAME Oil Store
METRIC
Description simple oil store hut
Credit Rail3D Tutorial
#Base
FILL -100/-100/0 100/-100/0 100/100/0 -100/100/0 50.50.50
# Sides
fill -100/-100/0 100/-100/0 100/-100/150 -100/-100/150 50.50.50
fill 100/100/0 -100/100/0 -100/100/150 100/100/150 50.50.50
#Front
FILL -100/100/0 -100/-100/0 -100/-100/150 -100/100/150 50.50.50
fill -100/0/200 -100/0/200 -100/-100/150 -100/100/150 50.50.50 $
#Back
fill 100/-100/0 100/100/0 100/100/150 100/-100/150 50.50.50
fill 100/0/200 100/0/200 100/100/150 100/-100/150 50.50.50 $
# Roof
FILL -110/-100/150 110/-100/150 110/0/200 -110/0/200 80.50.50
fill 110/100/150 -110/100/150 -110/0/200 110/0/200 80.50.50
and the model preview open.
Open Rail3Ds textures folder in Windows explorer, and look for a suitable texture:
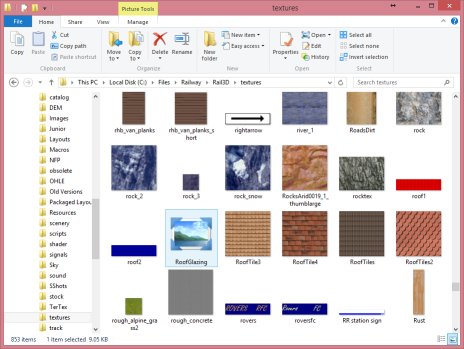
If you do not have a suitable toof tile bitmap in your "Textures" folder, right click this bitmap and save it as a bitmap in your textures folder as "RoofTile.bmp":
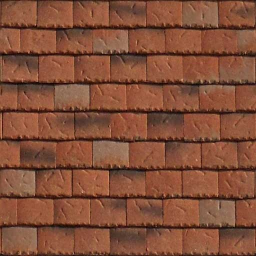
To apply this texture to the roof, we simply need to add the filename "RoofTile.bmp" to the FILL lines, like this:
# Roof
FILL -110/-100/150 110/-100/150 110/0/200 -110/0/200 80.50.50 "RoofTile.bmp"
fill 110/100/150 -110/100/150 -110/0/200 110/0/200 80.50.50 "RoofTile.bmp"
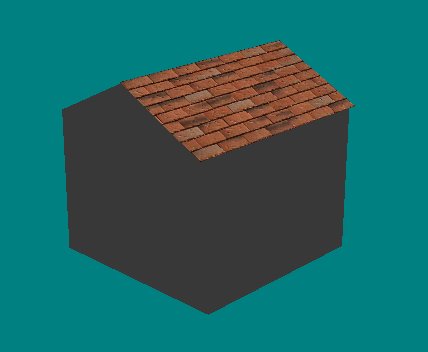
our preview now looks like this:
Similarly, we could also add a texture (eg brick, or wooden planks) to the sides. However, we are going to use a different technique "skinning" to texture the sides.
Using a texture skin
In Rail3D terminology a "Texture Skin" is a bitmap that covers more than one panel of the model, ideally the whole model. Texture skins render more efficiently than models with lots of seperate bitmap textures, so texture skins are preferred, especially with large complex models containing thousands of panels.
So, to start we need the texture skin that is going to cover the model:
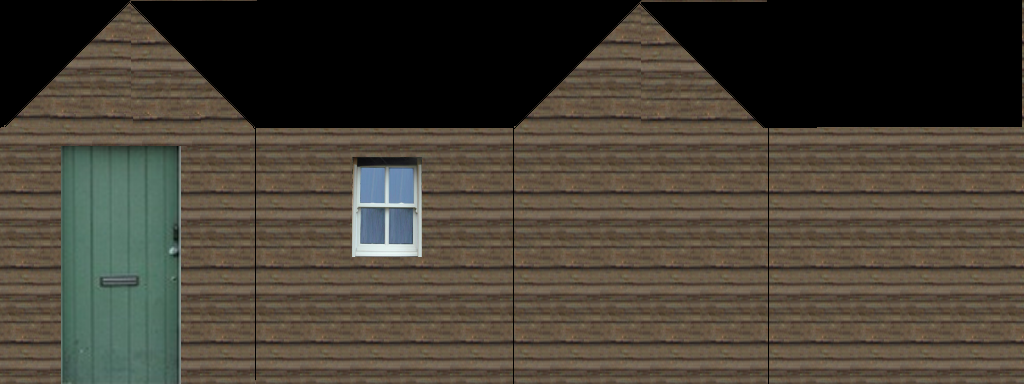
Hopefully you can see how this bitmap will be wrapped round the model. You can create your own skin bitmap or right click the above and download it. The skin needs to be in .BMP or .TGA foramt and go into the Rail3D \Textures folder or the scenery library sub-folder containing the .stc model file.
Applying the skin to the model
The first thing we need to do is add the SKIN keyword to the model file:
NAME Oil Store
METRIC
Description simple oil store hut
Credit Rail3D Tutorial
SKIN "Oilstore.bmp"
#Base
FILL -100/-100/0 100/-100/0 100/100/0 -100/100/0 50.50.50
etc
The SKIN keyword just gives the filename of the skin file. At this point the preview won't change, we have just told the program what skin we are going to use.
Now we can apply the skin to the panels we want it on, we'll start with the front end where the door is going to go.
Textures are defined by texture coordinates. Texture coordinates are positions across the bitmap from left to right and from up the bitmap from bottom to top. Texture coordinates go from 0 to 1, so texture coordinate 0,0 is the bottom left of the bitmap and 1,1 is the top right of the bitmap.
Knowing this we can work out the texture coordinates of the front of our model:
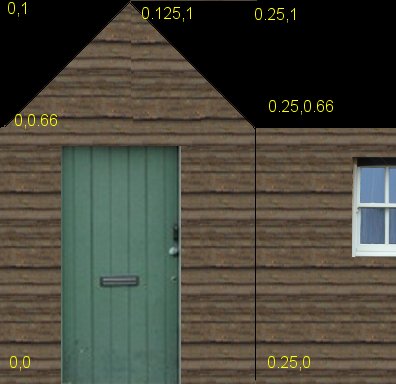
So we now edit the FILL for the front end to add the texture coordinates by adding an @ symbol, followed by four texture coordinates:
fill -100/100/0 -100/100/150 -100/-100/150 -100/-100/0 50.50.50 @0,0 0,0.66 0.25,0.66 0.25,0
Often, when you first apply texture coordinates, the texture is rotated, or upside-down:
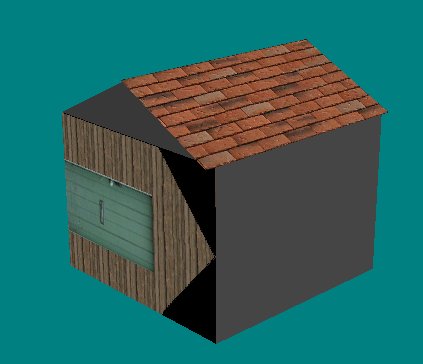
This is easily rectified - highlight the whole line and select "Rotate Panel Vertices Lft" (or right) from the "Translations" menu and the panel will be rotated:
We can also apply the texture to the triangular section of the end:
#Front
fill -100/100/0 -100/100/150 -100/-100/150 -100/-100/0 50.50.50 @0,0 0,0.66 0.25,0.66 0.25,0
fill -100/0/200 -100/0/200 -100/-100/150 -100/100/150 50.50.50 $ @0.125,1.0 0.125,1.0 0,0.66 0.25,0.66

Now we can continue around the building adding the @ section to each panel to apply the texture on all four sides:

Try to do this yourself, by working out the correct values for the texture coordinates for each side.
My result looks like this:
NAME Oil Store
METRIC
Description simple oil store hut
Credit Rail3D Tutorial
SKIN "Oilstore.bmp"
#Base
FILL -100/-100/0 100/-100/0 100/100/0 -100/100/0 50.50.50
# Sides
fill 100/-100/0 100/-100/150 -100/-100/150 -100/-100/0 50.50.50 @0.25,0 0.25,0.66 0.5,0.66 0.5,0
fill -100/100/0 -100/100/150 100/100/150 100/100/0 50.50.50 @0.75,0 0.75,0.66 1.0,0.66 1.0,0
#Front
fill -100/100/0 -100/100/150 -100/-100/150 -100/-100/0 50.50.50 @0,0 0,0.66 0.25,0.66 0.25,0
fill -100/0/200 -100/0/200 -100/-100/150 -100/100/150 50.50.50 $ @0.125,1.0 0.125,1.0 0,0.66 0.25,0.66
#Back
fill 100/100/0 100/100/150 100/-100/150 100/-100/0 50.50.50 @0.5,0 0.5,0.66 0.75,0.66 0.75,0
fill 100/0/200 100/0/200 100/100/150 100/-100/150 50.50.50 $ @0.625,1.0 0.625,1.0 0.5,0.66 0.75,0.66
# Roof
FILL -110/-100/150 110/-100/150 110/0/200 -110/0/200 80.50.50 "RoofTile.bmp"
fill 110/100/150 -110/100/150 -110/0/200 110/0/200 80.50.50 "RoofTile.bmp"
Further points
- You could include the roof tiles within the texture skin as well, and use the same @ notation to texture the roof from the skin
- Bitmap textures and texture skins render more efficiently when the texture size is a power of 2, eg 512, 1024, 2048 etc
- When mapping a texture to the model, it can be helpful to resize the bitmap in a bitmap editing program to be 1000*1000 pixels: you can then read the position of a point in the bitmap (eg 234/754) and easily convert it to the texture coordinate (@0.234,0.754). But don't forget to save the bitmap back as 1024*1024 for the model (see note above)
- It is possible to have transparent (or semi-transparent) areas of the texture (eg windows), but this is not covered in this tutorial
MRG 9/17/2014 7:30:56 AM