Importing Terrain
The next thing we need to do in the layout is to import the terrain. We do this before laying the track, because we want the track to be at the appropriate elevation, and until we get the terrain in, we don't necessarily know the height we want.
Importing the Terrain
Assuming you have set up the digitiser session as described previously (Preparing Maps) importing DEM terrain data is relatively easy.
- Open the digitiser and load the digitiser session created in the previous step.
- Scroll to the area you want to import the terrain for
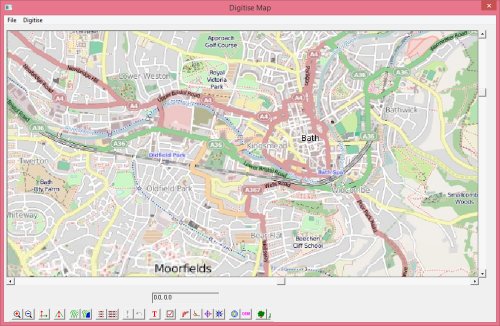
- Click the DEM button in the toolbar at the bottom.
We can now click on the map to outline the area we want to import terrain for. When we get to import the data, the program will allow us to select all the data (at 90m intervals) or sub-sample at 25% 33% etc. Usually we want the full resolution around the track, but we can use a lower resolution further away from the tracks. This will save memory and layout size.
- Click on the map to outline the area we want the "rougher" terrain:
- Click the "Commit" button : "!" - the "Import DEM Data" dialog opens:
- If you have not previously used the DEM tool to download data, you will see the blank dialog as above.
- Click "Download" and the tool will connect to the internet and download the relevant data set for the area of interest (This will take a while).
- Once the download is complete, you will find a new "DEM" folder under your Rail3D folder, and this will contain the data set.
- Note. If the area you are trying to digitise lies across the boundaries of a DEM tile set, the tool may download the wrong tile set. You will need to download the correct data set manually (see links below) and use the "Browse" button to select the correct tile set. This is not normally necessary.
IMPORTANT NOTE FOR USERS OF RAIL3D Version 108
The way files are stored on the CGIAR server has been changed. This means that Rail3D v108 cannot download data from the CGIAR server. To use DEM files with V108 you need to manually download the DEM data as follows:
- Go to the CGIAR website at http://srtm.csi.cgiar.org/SELECTION/inputCoord.asp
- Select the tile(s) you want to download on the map.
- Click the "Begin Search" button
- On the results page, select the file you want and download it, eg SRTM_36_02.zip
- When the download completes, open the ZIP file and extract the .TIF file inside. Put the .TIF file (eg STRM_36_02.TIF) in the Rail3D DEM folder (eg \rail3d\DEM)
- Rename the .TIF file, replacing the STRM with Z and removing any leading zeroes, eg (STRM_36_02.TIF becomes Z_36_2.TIF)
The Rail3D digitiser DEM import tool should now be able to find the DEM data and import it
- Once you have data downloaded, the name of the file will be shown in the DEM File window at the top of the form.
- Select the sample level you want to import ( in this case we will select 25%)
- Click "Import" to import the DEM data into the area marked.
- If you turn on "show terrain points" in the digitiser window, you will see the terrain points marked, this is useful as a check to the area imported:
We are now going to go back and import more detailed terrain around the track.
- Click the "DEM" button and mark the area around the track:
 (sorry, it doesn't show very well on this map)
- Click the "!" button again to open the Import DEM tool
- Select "All data (90m)"
- Click "import" (you won't need to download again)
- This will import more detailed terrain in the area where we are going to lay track:
- Repeat the process of importing DEM points as necessary.
Once you have finished importing terrain, save your layout, and select "Generate Terrain" from the "Scenery" menu (or use the toolbar button). This allows Rail3D to build the required mesh of triangles from the points created. Triangulation may take a while if you have a lot of points. When triangualtion is finished, save the layout.
Notes
- I would normally zoom the digitiser out and import terrain over a much wider area than shown in the example above. The small area above is just to show the principles.
- Rail3D can cope with a lot of points, I would normally use the full DEM resolution for about 500 metres either side of the line of route, and 50% or 30% out for another 10-15 km from the route. Even further in some cases - such as prominent mountain peaks.
Tutorials
Digitising The Route
For information on other ways to import DEM data, see:
MRG 06/02/2015 13:11:00